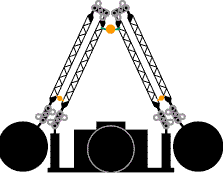
Taming long strobe arms out of the water:

The orange dots are bead-to-loop connections.
- what you'll need:
- Three 20mm beads with 3mm hole (check ebay)
- 10 feet (3 meters) of 3mm dacron accessory
cord
- matches or a lighter to seal the ends of the
cord
- total material cost less than $10.00
- assembly instructions:
- start by wrapping one end of the 3mm line tightly with scotch tape and cutting the line through the tape (result: a clean non-fraying end that you can thread beads on)
- if the beads cannot be threaded on the line, you'll have to run a drill through the hole to enlarge it (I used a 5/32" drill bit and clamped the bead in a vice to do this.)
- thread all three beads on the 3mm line
- bead section
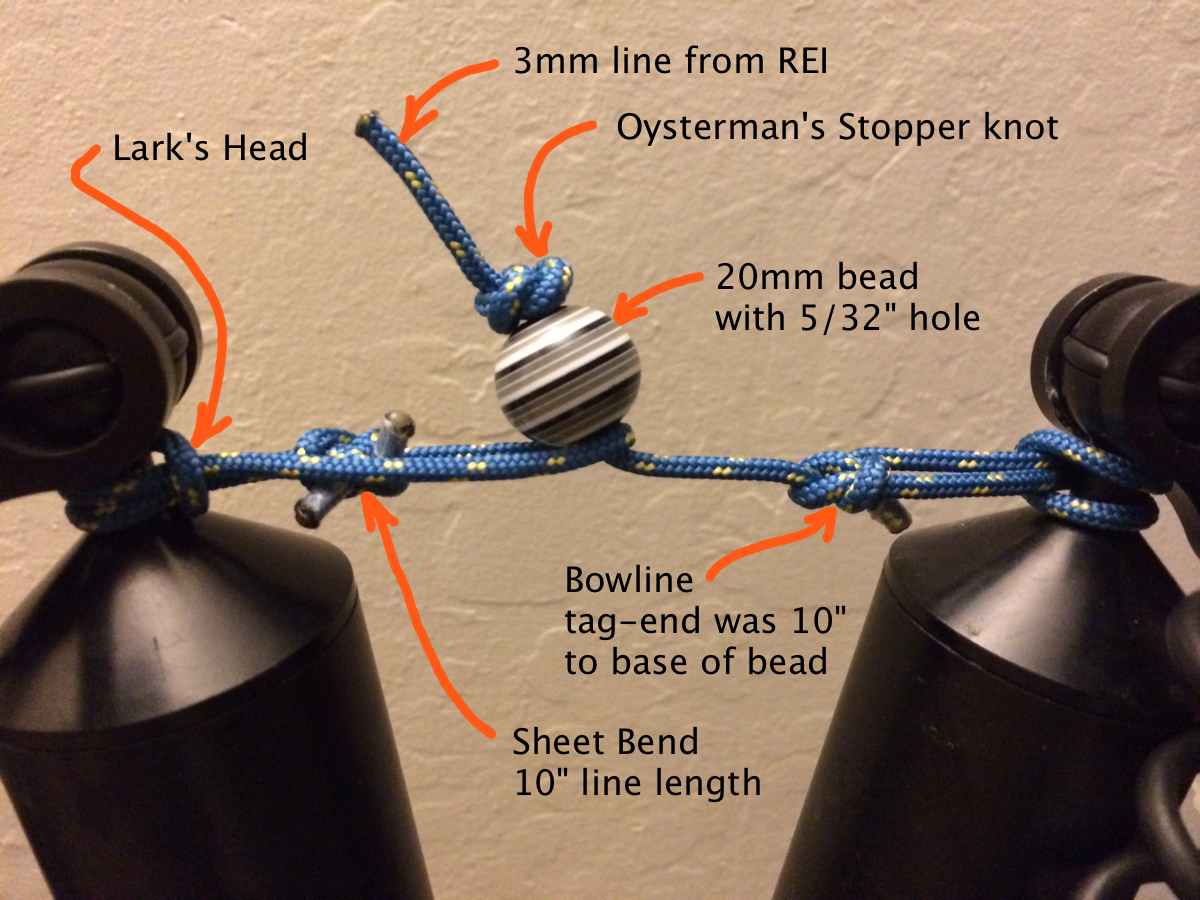
- tie an Osterman's Stopper knot at the end of the line
- slide one bead to the stopper knot
- measure 10" from the base of the bead along the line
- wrap the point you want to with scotch tape
- cut at 10" through the tape
- tie a bowline on that 10" tag end
- repeat two more times
- loop section
- measure 10 to 12" of line
- wrap the point you want to cut with scotch tape
- cut at your mark through the tape
- tie a sheet bend to form a loop
- repeat two more times
- light a candle and heat seal all the ends to prevent fraying
- installing
- one bead section and one loop section for each of the three points noted above.
- lay the loop across the part you want to attach it to
- thread the other end through the loop
- pull tight (you just tied a Lark's Head knot)
- Questions you might have:
- Why use three bead-to-loop connections when one at the top looks
like it would work?
Answer: the outside arm segments could still swing if
you grab anywhere except the top corner of the
triangle.
- Why not use only the two lower bead-to-loop connections?
Answer: the third buckle at the top locks the arms and
camera tray in to a rigid triangle so it won't move no
matter what point you grab it on.
Bead to loop connection:

|